Introduction
Apache CXF is a opensource web services framework which supports multiple types of APIs such as JAX-RS (REST) and JAX-WS (SOAP) and multple transports such as HTTP and JMS.
Apache CXF is compliant with the JAX-RS which is a Java EE specification about creating RESTful APIs in Java Enterprise applications, which was introduced by the JSR-311 standard.
There are several implementations of the JAX-RS standard such as Jersey, RESTeasy and of-course Apache CXF.
In this article I’m going to talk about how to create a simple JAX-RS application using Apache CXF and deploy it in Tomcat.
Creating Maven Project
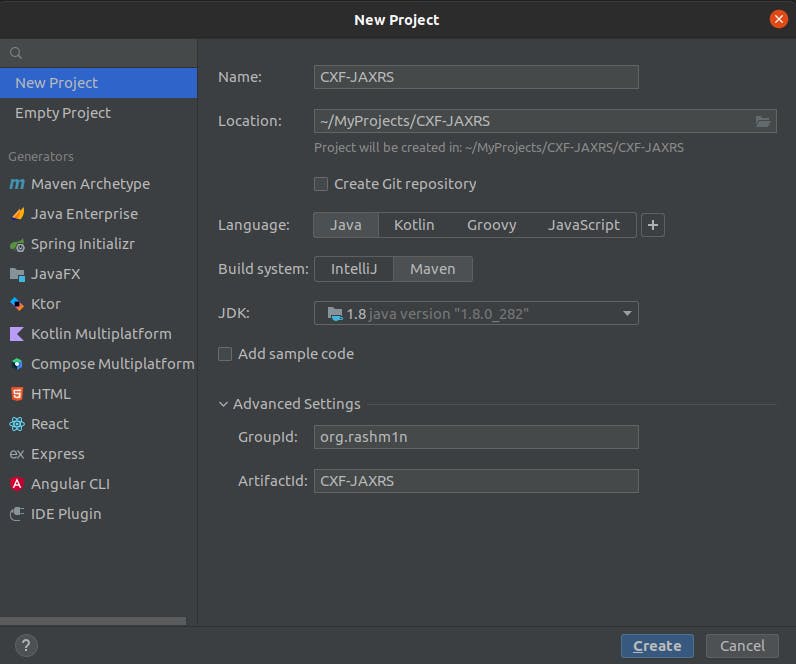
First Create a simple empty maven project using your preferred IDE. I will be using IntelliJ IDEA for mine.

After the maven project is created we need to add some dependencies in the pom.xml which will be used to create our web application.
In here we can see the initial cxf-rt-frontend-jaxrs dependency which provides the JAX-RS capabilities. And since Spring is closely integrated with Apache CXF and internally used in CXF, we will be using Spring to configure the JAX-RS configurations, so the two spring dependencies spring-context and spring-web are added. Since this web-application will be deployed in a tomcat server, javax.servlet.servlet-api dependency is also added. For the purpose of integrating JSON support, the jackson-jaxrs-json-provider dependency is added.
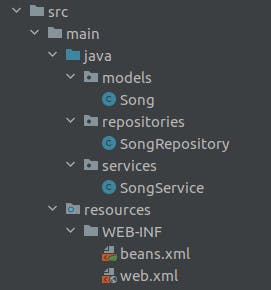
After adding these initial dependencies we can start to create the basic class structure. Here I’ll be creating 3 packages inside src.main.java directory named models, repositories and services .
Inside the model package, lets create a simple class named Song.
To simulate a data-layer, lets create a SongRepository class inside the respositories directory. Please note that we will be creating a dummy object and providing it directly to a request other than connecting to a real-database because it would complicate things.
Finally lets create the most important part of the application, the service class. Here we will be using standard JAX-RS annotations which are listed below.
@Path— Indicates a URI path@Consumes— Indicates that the API consumes the given media-type@Produces— Indicates that the API consumes the given media-type@GET— Indicates a GET method.
Adding Configurations
After creating the above simple class structure, lets add the necessary configurations. These configurations will be added in the src/main/resources/WEB-INF/ directory.
Since we are using Spring to setup the JAX-RS service, lets first create a beans.xmland define our service classes inside it.
Here we have defined our service beans inside the <jaxrs:server> tag and provided the single service which is present in our service. If you have multiple services, you could list them all as beans in here.
Since we need to add JSON support for this API, we will be referencing the previously added JacksonJsonProvider here.
lets create the final configuration , web.xml now. We need to first refer beans.xml file under the context-param tag to make the connection between the two configurations. As I previously stated, CXF uses Spring to provide XML configuration of services, so the spring ContextLoaderListener is added via a listener.
Since the JAX-RS specification is built on-top of Servlets, JAX-RS implementations should be provided with a Servlet as an entry-point to the application. That Servlet is responsible for the initial processing of the requests. In Apache CFX we use a provided Servlet called, CXFServlet .
Finally, your application code structure should look something like this.

Packaging
After the creation of the code, we should package this as a .war file to be deployed in the Tomcat server. For this we need to add two more configurations in the pom.xml file.
Specify the packaging with
<packaging>war</packaging>Specify the configuration location and war name with
maven-war-pluginas below.
org.apache.maven.plugins maven-war-plugin src/main/resources jaxrswar
The final pom.xml looks like this.
After this you could run mvn clean install on the project directory and a jaxrswar.war file will be created inside the target folder.
Now you should deploy this inside a servlet-container, I will be using Apache Tomcat 9 for this purpose.
I have created a simple Dockerfile which will easily create a docker image containing our built war file.
Include this inside the project home-folder and run docker build . inside a terminal from that exact folder. It will give you a response like below if successfully built.
Sending build context to Docker daemon 21.63MB
Step 1/4 : FROM tomcat:9.0.62-jdk8
---> 84d55ba5d6c1
Step 2/4 : ADD target/jaxrswar.war /usr/local/tomcat/webapps/
---> 5ccea8c355e3
Step 3/4 : EXPOSE 8080
---> Running in 67cccd7a72ef
Removing intermediate container 67cccd7a72ef
---> 3af35b518c31
Step 4/4 : CMD ["catalina.sh", "run"]
---> Running in 9403e9c69cbf
Removing intermediate container 9403e9c69cbf
---> 6d42782fb41e
Successfully built 6d42782fb41e
Then you could copy the image-id and create a new container like below.
docker run -p 8080:8080 6d42782fb41e
If you have done everything right, this must not give any errors and the war should be deployed successfully.
Finally, to test out the API, you could enter the below URL in the browser.
http://localhost:8080/jaxrswar/songs/2
And it should return a sample JSON response ! You could find the complete project on my Github.
GitHub - rashm1n/CXF-JAXRS: Creating a RESTful JAX-RS API using Apache CXF
That’s it for the article and thank you for reading. Follow the references if you want to learn more about JAXRS and Apache CXF ! Cheers. Give a follow in linkedin/twitter if you enjoyed the article !
Want to Connect ?
- Medium
- LinkedIn
- Twitter
- Threads
Find me everywhere @rashm1n.

